
Welcome to Rogue Squadron, pilot! In this series, we will be looking at different squadrons you can fly in Atomic Mass Games X-Wing miniatures game. We give you the squad and then give you the lowdown on how best to fly it. Strap in and get ready to fly.
All Wings Report In
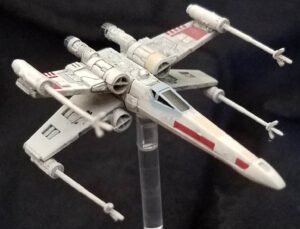
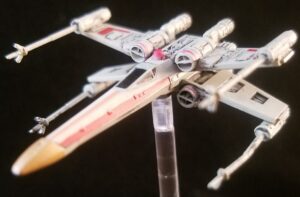 T-65 X-Wing “Wedge Antilles” (6 pts) (I6)
- Pilot Ability
- While you perform an attack, the defender rolls 1 fewer defense die.
- Ship Ability – None
- Loadout (18/18)
- Astromech – R4 Astromech (2)
- Decrease the difficulty of your speed 1-2 basic maneuvers.
- Configuration – Servomotor S-Foils (0)
- Closed
- Adds Boost, Focus –> Boost
- While you perform a primary attack, roll 1 fewer attack die.
- Before you activate, you may flip this card.
- Open
- Before you activate, you may flip this card.
- Closed
- Modification – None (-)
- Talent – Elusive (2)
- Charges: 1
- While you defend, you may spend 1 Charge to reroll 1 defense die.
- After you fully execute a red maneuver, recover 1 Charge.
- Talent – Predator (2)
- While you perform a primary attack, if the defender is in your Bullseye, you may reroll 1 attack die.
- Torpoedo – Proton Torpedoes (12)
- Forward Arc Attack (4), Range 2-3, Munitions
- Charges: 2
- Spend 1 Charge. Change 1 Hit result to a Crit result.
- Astromech – R4 Astromech (2)
 T-65 X-Wing “Luke Skywalker” (6 pts) (I5)
- Pilot Ability
- After you become the defender (before dice are rolled), you may recover 1 Force.
- Ship Ability – None
- Loadout (22/22)
- Astromech – R4 Astromech (2)
- Decrease the difficulty of your speed 1-2 basic maneuvers.
- Configuration – Servomotor S-Foils (0)
- Closed
- Adds Boost, Focus –> Boost
- While you perform a primary attack, roll 1 fewer attack die.
- Before you activate, you may flip this card.
- Open
- Before you activate, you may flip this card.
- Closed
- Force – Shattering Shot (3)
- While you perform an attack, if the attack is obstructed by an obstacle or the defender is at range 0 of an obstacle, you may spend 1 Force to add 1 Focus result.
- Modification – Munitions Failsafe (1)
- While you perform a Torpedo or Missile attack, after rolling attack dice, you may cancel all dice results to recover 1 Charge you spent as a cost for the attack.
- Talent – Trick Shot (4)
- While you perform an attack that is obstructed by an obstacle, roll 1 additional attack die.
- Torpoedo – Proton Torpedoes (12)
- Forward Arc Attack (4), Range 2-3, Munitions
- Charges: 2
- Spend 1 Charge. Change 1 Hit result to a Crit result.
- Astromech – R4 Astromech (2)
 T-65 X-Wing “Kullbee Sperado” (4 pts) (I4)
- Pilot Ability
- After you perform a Boost or Barrel Roll action, you may flip your equipped Configuration upgrade card.
- Ship Ability – None
- Loadout (7/7)
- Astromech – R4 Astromech (2)
- Decrease the difficulty of your speed 1-2 basic maneuvers.
- Configuration – Servomotor S-Foils (0)
- Closed
- Adds Boost, Focus –> Boost
- While you perform a primary attack, roll 1 fewer attack die.
- Before you activate, you may flip this card.
- Open
- Before you activate, you may flip this card.
- Closed
- Contraband – Contraband Cybernetics (3)
- Charges: 1
- Before you activate, you may spend 1 Charge. If you do, until the end of the round, you can perform actions and execute red maneuvers, even while stressed. This card’s Charges cannot be recovered.
- Modification – None (-)
- Missile – None (-)
- Talent – Daredevil (2)
- While you perform a white Boost action, you may treat it as red to use the Turn template instead.
- Astromech – R4 Astromech (2)
 T-65 X-Wing “Leevan Tenza” (4 pts) (I3)
- Pilot Ability
- After you perform a Boost or Barrel Roll action, you may perform a red Evade action.
- Ship Ability – None
- Loadout (7/8)
- Astromech – R4 Astromech (2)
- Decrease the difficulty of your speed 1-2 basic maneuvers.
- Configuration – Servomotor S-Foils (0)
- Closed
- Adds Boost, Focus –> Boost
- While you perform a primary attack, roll 1 fewer attack die.
- Before you activate, you may flip this card.
- Open
- Before you activate, you may flip this card.
- Closed
- Contraband – Contraband Cybernetics (3)
- Charges: 1
- Before you activate, you may spend 1 Charge. If you do, until the end of the round, you can perform actions and execute red maneuvers, even while stressed. This card’s Charges cannot be recovered.
- Modification – None (-)
- Missile – None (-)
- Talent – Notorious (2)
- Charges: 2
- After you defend, if the attacker is in your firing arc, you may spend 1 Charge. If you do, the attacker gains 1 strain token.
- While you perform an attack, if the defender is strained, you may reroll 1 blank result.
- Astromech – R4 Astromech (2)
Lock S-Foils in Attack Position
Houston’s Apollo Squadron recently held its Fall Seasonal Tournament. Instead of the usual location at The Forge, it was held as part of the Warzone Convention. I have to say, I wasn’t a fan of this change. Instead of a nice gathering of X-Wing players in a friendly store, it was X-Wing shoved into a crowded space and at a much higher cost. So we paid more for a worse experience.
Despite that, it was still a good time. Our Grand Marshall, Brian Serafine, knows how to put on a good event. We ended up having 23 people which is a slight improvement over the last one. There were a lot of familiar faces but also quite a number of newbies, which is always great to see.
Last time, I took a the full ocho TIE Swarm and flew them to victory. This time I went for an opposite build, and took four X-Wing. Same amount of health, half the ships. I have had an inclining to fly four X’s since seeing Top Gun earlier this year so decided this was a good time too put it down on the table. They’re far sturdier than TIE’s or the Eta-2’s I took to LSO.
Round 1- Scramble the Transmission- John Johnson
My first round set up a classic battle, X-Wing vs TIE Fighter. This TIE Swarm was only 7 ships, but it felt very similar to the list I had flown at the last seasonal. With the over abundance of TIE’s I had concern I might not be able to handle so many targets. Fortunately, he did not take advantage of his numbers early on, keeping them clumped together to take advantage of Howlrunner and Iden. Which, is preciously the reason I had foregone using Howlrunner. With his TIE’s in one swarm, I was able to tag two of the three objectives and maintain control of them for the whole game, which gave me a strong point advantage, netting me nearly half of my final total of 17 points.
He did use his swarm to good effect in the fight though. Iden forced me to waste a perfectly good proton torpedo and his combined fire was able to devour Luke. Unfortunately, he forgot the all important Discipline trigger a few times which might have a made a decisive difference, especially after Howlrunner died.
But while I might have beat John, his son would avenge him…
Round 2- Chance Engagement- Victor Tsai
I hate Vultures. I don’t know what it is about them but I do not have good luck against these darn droids. For starters, Chance Engagement is the absolute worst scenario for me to face them with. I had fewer, more expensive ships with lots of half points to give away. Viktor did not. It didn’t help that I made a really, really bad opening move. On setup, he had his Vultures pointed parallel to his edge, and I set up Wedge in one corner. I was hoping to either get Wedge in behind or bait him into hard turning and coming straight for Wedge, while Luke and Kullbee flanked them. Unfortunately, I miss judged an asteroid and Wedge was not able to escape. He was forced to engage the swarm head on and that went about as well as you’d expect.
My mistakes compounded later. On a crucial turn, Wedge chose to try and kill one of the Hyena’s instead of a Vulture. Had I gone for the Vulture, die results being the same, the Vulture would have died and that would have been one less shot coming in on Wedge. Maybe he survives another round. While his Grievous didn’t end up playing a big part in dealing out damage since I killed him in the second round of fighting, he did serve a vital function in eating all of Luke’s proton torpedoes and three or four shots, which could have been spent killing Vultures. It feels kind of bad when you fire a shattering shot/trickshot proton and get 3 Crits, 3 Hits and all you end up doing is stripping two shields thanks to an amazing defense roll and Impervium Plating.
Victor played his swarm flawlessly, making excellent use of the various support abilities on his Hyena’s and reminding me that I loath Discord Missiles.
Round 3- Assault at the Satelite Array- Dean Gibson
More Imperials for my Rebels to crush. Dean had me worried, coming at me with Vader in the X1 and Ryad in the Defender. Kullbee and Wedge ended up tangoing with those two in one corner and I thought Wedge was a goner. Fortunately, dice were with me and he only ended up losing one shield in that engagement. He also came out ahead the next round as both Ryad and Vader had very little room to maneuver to avoid going off the board and Wedge escaped and Kullbee was able to chase after them without getting shot at.
Meanwhile, on the opposite side of the board, Luke missed out on a shattering/trickshot proton on a Jingoist by about a millimeter, which allowed the Jingoist to survive another few rounds. He then spent a few rounds dancing around Wampa, which was a major net gain for Dean as my 6point ship was spending a ton of time to kill a 2pt ship. Fortunately, things turned around after that, as Luke managed to kill Wampa on the same turn I was able to gain control of three of the objectives and contest another. From there, Luke and Wedge combined fire to finish off the Countess and the Jingoists died to Leevan using Contraband to unexpectedly T-Roll and get a lock.
Round 4- Salvage Mission- Buckie Johnson
My name is Buckie Johnson. You killed my father. Prepare to die.
So I took down John in round one and came up against his kid here in round 4. And by kid, I genuinely mean kid as he was only 11. Now, I have a 10-year-old so I know not to underestimate someone just because they’re young. Unfortunately, John had laid the seeds for my demise earlier when he said he had been trying, and failing, to teach Buckie to not just blitz forward. I took this note to heart, and during the initial assessment, I made the assumption Buckie would do exactly that. Well, you know what happens when you assume…
I had been trying for an envelopment formation against his ships which he had assembled in the center. And it mostly worked. Unfortunately, he slow rolled, and then turned hard for Wedge. I misjudged distance, and had tried to barrel roll Wedge back out of range but failed to make it. So Wedge went into the first engagement, tokenless and unable to fire his torpedoes. Leevan was nearby and got chewed up and Wedge emerged with only a single health remaining. He was able to disengage and remained on the board until the very last round with that one health, but he spent most of that time trying to clear his crits and didn’t contribute much. Meanwhile, my Luke got the dream shot against his Luke and fired a shattering/trickshot proton that whiffed hard. I think he only stripped Luke’s shields. Kullbee also fired on Luke and didn’t do much else. They both had to combine fire the next round to finish him off.
I was able to pull a head for a little while and whittle him down to two ships. Unfortunately, both my remaining ships were at one health and he made excellent use of the U-wings ability to spin around and face whatever direction it wants too. He ended up wiping me out. We both had completely ignored the crates.
Loadout Variations
I never ended up using Daredevil on Kullbee. I thought it might be a good option for him, but the positioning never worked out where it was better to do that hard boost as opposed to a focus linked to regular boost. Daredevil only triggering off white boosts really kills the value of the card. I would probably switch that out.
Elusive and Predator were okay on Wedge but I think I would have preferred Trickshot. The opportunities to use it would have been about the same, but an extra attack dice might have had a far greater impact on the games than the other two.
Luke worked out great. While R4 astromech served me amazingly well on all my ships throughout the tournament, trading Munitions Failsafe in for an R3 might have been worth it.
Notorious worked great on Leevan. It’s a shame it’s unique, though probably a good thing.
Contraband made a difference only twice, but I don’t think any alternative would have been better. False Transponder potentially could have mattered but I think it’s a wash between the two. You have more control of when you benefit from Contraband though.
 Check out Wayne’s new book, Seraph’s Bind.


Wayne Basta
Latest posts by Wayne Basta (see all)
- X-Wing Tier List – Rebels - May 10, 2023