
Welcome to Rogue Squadron, pilot! In this series, we will be looking at different squadrons you can fly in Atomic Mass Games X-Wing miniatures game. We give you the squad and then give you the lowdown on how best to fly it. Strap in and get ready to fly.
All Wings Report In
TIE/ln Fighter “Mauler Mithal” (3 pts) (I5)
- Pilot Ability
- While you perform an attack at attack range 1, roll 1 additional attack die.
- Ship Ability – None
- Loadout (4/4)
- Cannon – Heavy Laser Cannon (4)
- Attack (4), Bullseye Arc, Range 2-3
- After the Modify Attack Dice step, change all Crit results to Hit results.
- Attack (4), Bullseye Arc, Range 2-3
- Talent – None (-)
- Cannon – Heavy Laser Cannon (4)
TIE/ln Fighter “Iden Versio” (3 pts) (I4)
- Pilot Ability
- Before a friendly TIE/ln fighter at range 0-1 would suffer 1 or more damage, you may spend 1 Charge. If you do, prevent that damage.
- Charge: 1
- Ship Ability – None
- Loadout (8/8)
- Cannon – Heavy Laser Cannon (4)
- Attack (4), Bullseye Arc, Range 2-3
- After the Modify Attack Dice step, change all Crit results to Hit results.
- Attack (4), Bullseye Arc, Range 2-3
- Missile – None (-)
- Modification – Precision Ion Engines (2)
- Charges: 2
- Before you execute a speed 1-3 Koiogran Turn maneuver, you may spend 1 Charge to execute that maneuver as a Segnor’s Loop maneuver instead.
- Talent – Discipline (2)
- After another friendly ship at range 0-3 is destroyed, if that ship is limited or has the Disciplined upgrade, you may perform a Lock or Barrel Roll action.
- Talent – None (-)
- Cannon – Heavy Laser Cannon (4)
TIE/ln Fighter “Del Meeko” (3 pts) (I4)
- Pilot Ability
- While a friendly ship at range 0-2 defends against a damaged attacker, the defender may reroll 1 defense die.
- Ship Ability – None
- Loadout (6/6)
- Cannon – Heavy Laser Cannon (4)
- Attack (4), Bullseye Arc, Range 2-3
- After the Modify Attack Dice step, change all Crit results to Hit results.
- Attack (4), Bullseye Arc, Range 2-3
- Talent – Discipline (2)
- After another friendly ship at range 0-3 is destroyed, if that ship is limited or has the Disciplined upgrade, you may perform a Lock or Barrel Roll action.
- Cannon – Heavy Laser Cannon (4)
TIE/ln Fighter “Gideon Hask” (3 pts) (I4)
- Pilot Ability
- While you perform an attack against a damaged defender, roll 1 additional attack die.
- Ship Ability – None
- Loadout (8/8)
- Missile – Cluster Missile (4)
- Charges: 4
- Attack (Lock, 3), Front Arc, Range 1-2, Munition
- Spend 1 Charge. After this attack, you may perform this attack as a bonus attack against a different target at range 0-1 of the defender, ignoring the Lock requirement.
- Modification – Targeting Computer (1)
- Adds Lock action
- Talent – Discipline (2)
- After another friendly ship at range 0-3 is destroyed, if that ship is limited or has the Disciplined upgrade, you may perform a Lock or Barrel Roll action.
- Talent – Deadeye Shot (1)
- While you perform a primary attack, if the defender is in your Bullseye Arc, you may spend 1 Hit result or change 1 Crit result to a Hit result. If you do, the defender exposes 1 of its damage cards.
- Missile – Cluster Missile (4)
TIE/ln Fighter “ISB Jingoist” (2 pts) (I4)
- Pilot Ability
- Before you engage, you may choose 1 enemy ship in your Front arc at range 0-1. If you do, that ship gains 1 deplete or strain token of your choice unless it chooses to remove 1 green token.
- Ship Ability – None
- Loadout (3/3)
- Illicit – Cloaking Device (3)
- Charges: 2
- Action: Spend 1 Charge to perform a Cloak action.
- At the start of the Planning Phase, roll 1 attack die. On a Focus result, decloak or discard your cloak token.
- Illicit – Cloaking Device (3)
TIE/ln Fighter “ISB Jingoist” (2 pts) (I4)
- Pilot Ability
- Before you engage, you may choose 1 enemy ship in your Front arc at range 0-1. If you do, that ship gains 1 deplete or strain token of your choice unless it chooses to remove 1 green token.
- Ship Ability – None
- Loadout (3/3)
- Illicit – Contraband Cybernetics (3)
- Charges: 1
- Before you activate, you may spend 1 Charge. If you do, until the end of the round, you can perform actions and execute red maneuvers, even while stressed. This card’s Charge cannot be recovered.
- Illicit – Contraband Cybernetics (3)
TIE/ln Fighter “Valen Rudor” (2 pts) (I3)
- Pilot Ability
- After a friendly ship at range 0-1 defends (after damage is resolved, if any), you may perform an action.
- Ship Ability – None
- Loadout (1/1)
- Talent – Deadeye Shot (1)
- While you perform a primary attack, if the defender is in your Bullseye Arc, you may spend 1 Hit result or change 1 Crit result to a Hit result. If you do, the defender exposes 1 of its damage cards.
- Talent – Deadeye Shot (1)
TIE/ln Fighter “Wampa” (2 pts) (I1)
- Pilot Ability
- Charges: 1 (reoccurring)
- While you perform an attack, you may spend 1 Charge to roll 1 additional attack die.
- After defending, lose 1 Charge.
- Ship Ability – None
- Loadout (2/2)
- Talent – Discipline (2)
- After another friendly ship at range 0-3 is destroyed, if that ship is limited or has the Disciplined upgrade, you may perform a Lock or Barrel Roll action.
- Talent – Discipline (2)
Lock S-Foils in Attack Position
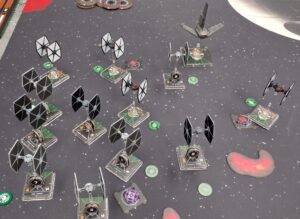
No one would take eight TIE Fighters. That’s a crap list. It’s dead. Well, I decided to test this theory out and took the “Ocho” to the big Houston summer tournament. I wanted to see how they would do. Especially now that you can take eight interesting ships. It’s not eight boring generic TIE Academy Pilots. Each one of these has an ability and at least one upgrade. Well, turns out they can do okay as I ended up winning the tournament (21 participants).
Note: You can find the round break down on TTT here BUT many of the lists you’ll need to look here for. There were some technical difficulties after round and the TO had to recreate the event.
List Break Down
The core thing I wanted was to fly 8 TIE’s and to not take any generics if I could help it. There are exactly four 2pt non-generic TIE’s and a wide range of 3pt TIE’s which gives several list options. I ended up going with this one because of the damage potential it gives. You have three Heavy Laser Cannons which ended up being very effective against large/medium base ships. Additionally, you have three pilots that have the chance to roll additional dice under certain conditions. Mauler is four dice range one or anywhere in bullseye. Gideon gets his b0nus if his target has a damage card. Since this list has five ships that have a chance to shoot before him, there’s a good chance he’ll have a damaged target to shoot at. What’s even better, his ability does not specify primary. If you can damage two targets that are in Cluster Missile range, he can fire double four die Cluster missiles. That hurts. Only managed to pull it off once in 6 games but it was nice to see.
Other key features of the list was Iden and Disciplined. Iden is you get out of jail free card. During that initial engagement, when you’re going to lose a TIE before it gets to fire, she can deny that death. This keeps your overwhelming eight ship attack intact for a strong opening blow. Related to that is Disciplined. With so many ships, you have many chances for it to trigger. And because all of your ships are limited, it works on any death. Target Locks are great to get for ships that normally can’t. . Just don’t forget about, like I did multiple, multiple times.
Finally, the unsung hero of the list is Valen Rudor. You don’t want to waste actions with your TIE’s on objectives. Yes, you will almost certainly have more ships than your opponent so you have more actions available to do that. They need tokens to stay alive and have a hope of dealing damage. That’s where Valen Rudor comes in. He can afford to spend his action to tag/pick up an objective because at I3, someone near him is going to get shot, granting him a free action to token up. He won’t be able to barrel roll with him when carrying salvage, but since he wants to be in the middle, he often can’t anyways.
Round Break Down
Round 1: Scramble the Transmission- Charlie Kaminsky- First Order
I almost crashed and burned right out of the gate. No knock to my opponent’s skill, but had I lost it would have been my fault. In one turn, I killed two of my TIE’s by crashing them into each other. I learned a valuable lesson that game. Don’t fly in the old school formations. The maneuvering room is too tight and self damage on a three health ship is costly.
The main reason I managed to pull of a win in this game was because I destroyed Malarus and Backdraft first and then managed to initiative kill some of his SF’s later. Had they need I4’s, they would have taken a bunch of my ships down with them. Our score ended up being 24 to 18, which could have been 24 to 24.
Round 2: Salvage Mission- Greg Webster- Rebels
My second game was against a tournament greenhorn. Despite this being his first tournament, he did quite well. He spread his ships out, avoiding the honorable joust that would have favored my mass of ships. Though, in retrospect, it might have allowed him to get off more protons and decimated a few TIE’s early. Especially since I had learned my lesson from the first game and spread my TIE’s out in a very wide formation. If he had deployed and rushed after a pair on the side, he might have been able to get ahead of the curve.
Unfortunately, bad luck and inexperience with maneuvers cost him. Lando got hit by double stress from a crit after also landing on a rock, losing the ability to fire on a critical round. That double stress shut the poor Lando down completely as he couldn’t use Bistan or his double action ability.
Round 3: Chance Encounter/Top 4: Scramble the Transmission- Greg Ferrington
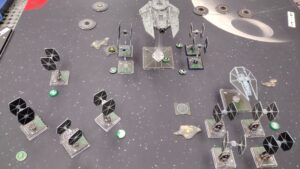
I faced Greg twice and they were my two closest games. It was a half mirror match, in that we had four of the same TIE fighters. These were the hardest games mentally, as fourteen ships on the board is a lot to contend with. I do not relish facing a mirror or a droid swarm. There’s a reason I haven’t played eight TIE’s in 7 years.
Because of the massive amount of ships, both games went to time. The first one, came down to him deciding not to reinforce with the Decimator and losing it and all of those points right at the end. The second game, I think had more to do with tiredness. While for most games I had been spreading my ships out, but knew I had to delete his big ships early or lose. He made the mistake of thrown Vermeil right at one box of TIE’s. Four range one shots was enough to melt Vermeil (and Vader that he carried). I lost Iden’s charge and Gideon in the exchange but it started him off in a bad position.
Round 4: Assault at the Satelite Array- Carlo Badiola
This one also gave me a lot of trouble. Carlo’s a great player and he took full advantage of some of his list. Malarus with clusters is a pain to kill and to get shot at by. Two main things let me pull out a win. Mass of bodies let me contest more objectives. His medium base made a difference but medium bases also eat HLCs. Also, with the wide spread formation I used forced him to swing Blackout way to the back of the board. With that cloak he wanted to flank with Blackout but there was no avenue that allowed him to do that quickly. That put Blackout of out the fight for several around, so he didn’t get to participate much.
Top Table: Salvage Mission?- Jeremy Green
We were both tired when this game started. It was after 8 and the tournament started at 11. The scenario ended up not making much difference, I think it was Salvage Mission, but it might have been Assault. There were five objectives. I had a major advantage over Jeremy in that my cognitive load went down facing his four ships versus my previous game against Greg’s six where as his went from four opponents to now my eight. He had also had 30min for his brain to start shutting down because he wrecked his Top 4 opponent and my game went to time. Rest is good but too much when you’re already tired can lead to shut down.
Once again, I set up in a wide pattern. I think Jeremy thought this would allow him to pounce on a part of the formation with Lando and the X-Wing’s, leaving Cracken to score objectives off to the side all by his lonesome. Fortunately for me, I was able to pull off the perfect envelopment around Lando. Seven of my TIE’s got to shoot him, that included two HLC’s and both Gideon and Mauler got their ability bonus dice. Lando did not fair very well under that onslaught. I was tempted to go after Kullbee, who had anded up range 1 of several TIE’s, but I was able to maintain enough clarity of mind to know to focus on the big expensive ship.
That was the last clear headed decision I made because I missed several Disciplined triggers, forgot to use Iden’s ability twice in one round at the loss of two TIE’s. It didn’t end up costing me the game but it could have if some dice luck had also swung against me and in his favor.
Summation/Lessons Learned
The new bumping rules has a major impact on flying this many ships. You can’t afford self damage except in certain do or die situations. That means the round after you converge on an opponent is the most mentally taxing. You have a bunch of your ships that need to cross paths and they can’t run into each other. Additionally, having eight ships with a variety of different upgrades further increases the mental load. You don’t just have maneuvers to figure out, you have different initiatives and goals. Who needs bullseye? Who needs range one for something? Who has Disciplined? Whose close enough for Del Meeko’s reroll? Does he even apply to this attack?
As I almost never fly the same list twice, I am unlikely to play this again. So how would I beat it? A lot comes down to your opponent. This is the kind of list where you are your own biggest opponent. So playing the opponent will be a key strategy.
Not letting TIE’s escape with damage is another. The usual rules of avoiding range 1 still apply. Catching ships when Iden’s not near them. And let’s not forget the art of blocking. TIE Swarms are likely going to have an I1, even if that’s only Wampa. But unlike old school swarms, there are a lot of I4s. That gives anyone with lower initiative some blocker potential. Jamming up a bunch of TIE’s, forcing them to self-bump, can turn a game around.
Loadout Variations
You could do eight TIE’s a bunch of different ways. I originally started with Moff Gideon instead of Mauler and had all the 3 cost TIE’s outfitted with Juke but decided that never works out the way I want it too. Another attempt had Howlrunner and the other two I5’s, and then five 2pointers, so had to take a generic. And yet another was all of Inferno Squadron and the generics. Seyn is fun but doesn’t have the loadout to do Juke or a weapon. That makes her more swingy.


Wayne Basta
Latest posts by Wayne Basta (see all)
- X-Wing Tier List – Rebels - May 10, 2023