
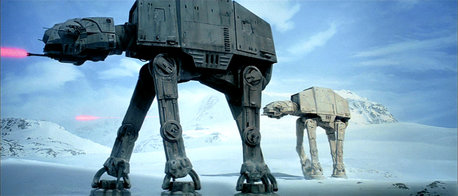
All Terrain Armoured Transports, or AT-ATs, are powerful weapons of war and symbols of the Empire’s overwhelming might. Inspired by the immersive Star Wars: Battlefront by DICE and published by EA, GMs can use the following rules to bring the dramatic tension of fighting these technological terrors to their own Age of Rebellion games. The intent of these rules is to provide challenging, but possible ways for a group of outgunned Rebels to play David to the Imperial Goliath. All of these rules may not be appropriate if your group is armed with a substantial amount of starship grade anti-vehicle weaponry. This article presents rules for Battlefront’s Ionization Exposure, known AT-AT weak points, and of course the iconic harpoon and tow cable takedown.
Ionization Exposure
The AT-AT’s highly durable armor is partly due to advances in hyper dense materials science. While this makes AT-ATs nearly invulnerable to all but specific anti-armor weapons, a flaw in this design can be exploited to temporarily weaken the armor. If struck by an ion weapon at a precise point, the armor will temporarily be ionized greatly reducing the efficacy of its defenses.
An aimed (adding Setback as per targeting a specific component), close range, vehicle grade ion weapon attack at Formidable (5 Purple) difficulty will cause the AT-AT to gain the Ionization Exposure condition. Reduce the AT-AT’s armor by 3 + 1 for every two advantage spent, lasting for 4 rounds + 1 additional round per success. Triumphs may be spent to reduce the AT-AT’s armor to zero, or to extend the duration for 3 rounds per Triumph spent.
A spotter may reduce the difficulty of the above check by making a Hard (3 Purple) Perception check if within Medium range. If successful, reduce the difficulty of the attack to Hard (3 Purple) if made within the next round. The spotter must be able to see the AT-AT and have a means of communicating with the attacking gunner such as via comlink.
Weak Spots
The AT-AT is not without its weak spots. A character who makes either a Daunting (4 Purple) Warfare check or successfully activates the Known Schematic Talent is aware of the following weaknesses. In order to hit one of these weak spots a character must aim, adding Setback as per targeting a specific component.
Neck
Silhouette 2, Armor 2, Hull Trauma 15. Track this damage separate to the AT-AT’s normal hull trauma.
The neck bridging the cockpit and the main body is difficult to hit, but as seen in Star Wars: Rebels season 2 it is vulnerable. Due to the relatively compact nature of the neck any attack suffers an additional Setback in addition o the normal penalty for targeting a specific component. If the neck is destroyed, the AT-AT suffers the Breaking Up critical hit.
Underbelly
Silhouette 3, Armor 2. Damage dealt to the underbelly is applied to the AT-AT’s total hull trauma.
Since the biggest threat to AT-ATs are starship grade anti-vehicle weapons, Imperial walkers are more heavily armoured on their sides and tops. The relatively small underbelly has slightly weaker armor designed primarily to deflect man-portable weaponry. GMs must use their best judgement on whether a given attack can target the underbelly, but a good rule of thumb is that it must come from ground level within Medium range.
Underbelly Maintenance Panels
Silhouette 0, Armor 1. Special.
For those players who wish to get up close and personal with an AT-AT by following the Luke Skywalker example in The Empire Strikes Back, some GM fiat will be required. Should a character destroy an armored panel and post some sort of grenade inside the results should be determined by what is most narratively appropriate. I would recommend such an action causes an immediate Critical Hit with minimum results, similar to the disrupter special rules, depending on the weapon type. Something as humble as a frag grenade may warrant a simple roll, whereas posting a thermal detonator inside should result in at least a Major System Failure. Your best judgment as a GM will apply, but a successful attempt should produce results commensurate with the danger and difficulty involved.
Harpoons and Tow Cables
Age of Rebellion presents efficient, if brief rules on using the T-47 Airspeeder’s electromagnetic tow cable to down targets such as the AT-AT. If you missed these, don’t worry, so did I on my first reading. I’ll explain my interpretation of rules as written before offering what I feel is a more climactic option for this iconic scene.
The T-47 Airspeeder stats are listed on AoR pg 263 and include an aft turret-mounted electromagnetic harpoon with Tractor 3, Knockdown, and Limited Ammo 1. What this means is a successful Gunnery check using with weapon against an AT-AT will automatically apply the Tractor 3 condition (target may not move unless it makes a Hard (3 Purple) Pilot check) representing the AT-AT being tangled in the cable, and the gunner may spend 5 advantage (2 base plus one for each silhouette above one) to activate Knockdown causing the AT-AT to go “prone.” What exactly an AT-AT going prone means mechanically is up to the GM, but outright destruction wouldn’t be out of the question. At the very least I would apply the following: speed 0, one weapon system destroyed depending on how it lands, and apply the Destabilized critical hit.
For GMs who want the take down of an AT-AT to be a climactic event with tension spread over multiple checks my alternative rules are for you.
First, a gunner must make an aimed electromagnetic harpoon attack against a Silhouette 3 AT-AT leg, suffering Setback for targeting a specific component, in order to attach the tow cable. From a T-47 Airspeeder the negative dice for this check would be Average (2 Purple) Gunnery plus either 2 Setback for single maneuver aim, or 1 Setback for double maneuver aim. Good shot, Janson!
Next, the pilot must fly a close pattern around the AT-AT. This is challenging but not excessively risky for the first few passes, requiring a Daunting (4 Purple) Pilot check, with one difficulty upgrade for a total of 3 Purple, 1 Red in the dice pool. If this check fails, the tow cable is expended and detached. If successful, the target AT-AT will suffer Tractor 3 as described above and the pilot may attempt the One More Pass action. The pilot may choose to discontinue the attempt at this point, detaching the cable.
Finally, the pilot takes the One More Pass action, requiring a Daunting (4 Purple) Pilot check, with two difficulty upgrades for a total of 2 Purple, 2 Red in the dice pool. This represents the tight maneuvering required at the end of the tow cable’s length. If this check fails, the tow cable is detached ending the attempt. If successful, the pilot has sufficiently wrapped the legs and detaches the cable, thus the AT-AT suffers the Breaking Up critical hit as it comes crashing down.
Tow cables were never designed to be used this way so GMs are encouraged to use the following additional options for resolving Despair in addition to those listed on AoR pg 251:
1 Despair – Cable Detach Failure. Use when the tow cable is detached. Due to unintended stresses on the harpoon gun the cable fails to detach normally. Instead, it breaks loose from the housing causing a Component Hit to the electromagnetic harpoon and the vehicle suffers 2 system strain.
1 Despair – Cable Collision. The pilot flies too wide on a pass leaving slack in the cable, as he comes around the falling cable impacts the cockpit and slides off. The vehicle suffers the Jostled critical hit, except the pilot suffers 3 strain instead of 1.
2 Despair – Suffer a Major Collision, even on a successful check. The AT-AT is unharmed by the collision.
What do you think of these rules? Something crazy enough to work? Just what your PCs would do? Too overpowered? I look forward to hearing from you in the comments below!
Christopher Hunt
Latest posts by Christopher Hunt (see all)
- Command School – Deterrence and Compellence - July 11, 2019
My only issue with this is that you’ve combined “aim at a specific part” with treating those parts as smaller silhouettes.
If you’re trying to trip AT-AT with an airspeeder, either you’re firing the harpoon at a specific part of a silhouette 4 walker — an Easy roll that requires the Aim maneuver with appropriate setbacks — or you’re firing at a silhouette 3 target — an Average roll with no aiming or setbacks. It’s not both. Pick one.
Hey Darth Pseudonym, good point. The reason I applied both was because I am concerned that without making it more difficult that just one of those rules the check would be too easy both narratively and in terms of the mechanical benefit if successful.
However, as you say, they are indeed separate rules and by combining them I may have made things too difficult / complex. I’ll have to take a look at the numbers again and see it in play a few times to determine if I would keep it as presented, or go with one or the other as you would prefer.
Thanks for the feedback!
Looks good, these rules would be really fun to try out in a one off Battle of Hoth style of game. Maybe something to consider for your high XP Age playtest.
Thanks, Brett! Yeah, I think I’ll definitely give these a go for that.