Welcome to Rogue Squadron, pilot! In this series, we will be looking at different squadrons you can fly in Fantasy Flight Games X-Wing miniatures game. We give you the squad, what expansion pack all of the upgrades come from and then give you the lowdown on how best to fly it. Strap in and get ready to fly.
All Wings Report In
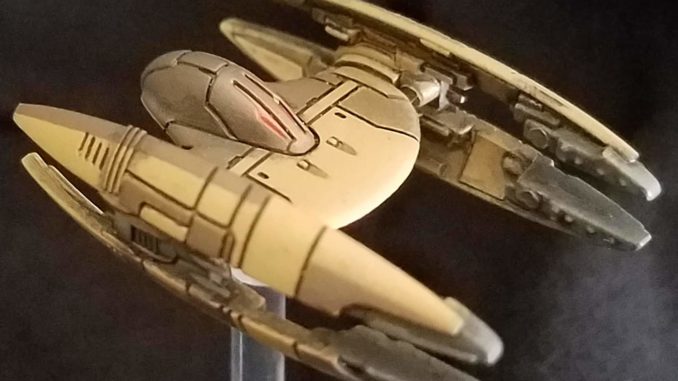
 2x Hyena-Class Droid Bomber “Baktoid Prototype” (Hyena Expansion Pack) (40ts) (I1)
While you perform a special attack, if a friendly ship with the Networked Calculations ship ability has a lock on the defender, you may ignore the Focus, Calculate or Lock requirement of that attack.
Networked Calculations: While you defend or perform an attack, you may spend 1 calculate token from a friendly ship at range 0-1 to change 1 Focus result to an Hit or Evade result
- Missile- Barrage Rockets (Wave 1):Charges: 5 Attack 3, Range 2-3 (Focus): Spend 1 Charge. If the defender is in your Bullseye, you may spend 1 or more Charges to reroll that many attack dice.
- Sensor- Passive Sensors (Wave 4): Charge: 1 (Reoccurring) Action: Spend 1 Charge. You can only perform this action in your Perform Action step. While your Charge is inactive, you cannot be coordinated. Before you engage, if your Charge is inactive, you may perform a Calculate or Lock action.
- Configuration- Landing Struts (Wave 4):
- Closed: Setup: Equip this side faceup. While you execute a maneuver, if you overlap an asteroid or debris cloud and there are 1 or fewer other friendly ships at range 0 of that obstacle, you may flip this card.
- Open: You ignore obstacles at range 0 and while you move through them. After you reveal your dial, if you reveal a maneuver other than a 2 straight and are at range 0 of an asteroid or debris cloud, skip your Execute Maneuver step and remove 1 stress token; if you revealed a right or left maneuver, rotate your ship 90º in that direction. After you execute a maneuver, flip this card.
 3x Vulture-Class Droid Fighter “Trade Federation Drone” (Servants of Strife/Vulture Expansion Packs) (25ts) (I1)
Networked Calculations: While you defend or perform an attack, you may spend 1 calculate token from a friendly ship at range 0-1 to change 1 Focus result to an Hit or Evade result
- Missile- Energy Shell Charges (Wave 3): Charges: 1
- Attack 3, Range 2-3 (Calculate): Spend 1 Charge. While you perform this attack, you may spend 1 calculate token to change 1 Focus result to a Crit result.
- Action: Reload this card
- Configuration- Grappling Struts (Wave 3):
- Closed: Setup: Equip this side faceup. While you execute a maneuver, if you overlap an asteroid or debris cloud and there are 1 or fewer other friendly ships at range 0 of that obstacle, you may flip this card.
- Open: You ignore obstacles at range 0 and while you move through them. After you reveal your dial, if you reveal a maneuver other than a 2 straight and are at range 0 of an asteroid or debris cloud, skip your Execute Maneuver step and remove 1 stress token; if you revealed a right or left maneuver, rotate your ship 90º in that direction. After you execute a maneuver, flip this card.
 Belbullab-22 Starfighter “Feethan Ottraw Autopilot” (Servants of Strife Expansion Pack) (45ts) (I1)
None
- Modification Impervium Plating (Wave 4): Charges: 2. Before you would be dealt a faceup Ship damage card, you may spend 1 Charge to discard it instead.
- Tactical Relay- TA-175 (Wave 4):After a friendly ship at range 0-3 with Calculate on its action bar is destroyed, each friendly ship at range 0-3 with Calculate in its action bar gains 1 calculate token.
Lock S-Foils in Attack Position
You’ll want to start in a tight formation. Approach, trying for all six ships getting an attack on the opening volley. Thanks to the struts, you can safely ignore the rocks as you set up this opening volley. Your Vultures are your sacrificial pieces. They’ll die but that’s okay. Any you lose in the opening engagement will beef up the others thanks to TA-175.
Your two bombers and the Autopilot can maintain the three dice attack for longer. Drop some ships onto a rock and make them defense towers. Keeping your squad close is nice for Network Calculation but spreading them out after the initial engagement can keep your opponent guessing. TA-175 works out to range 3 so his benefit will continue even if you do spread out.
If your opponent goes for the Autopilot first, he’s the hardest to kill thanks to shields and the ability to just completely ignore two crits. He’s also the best to have alone in the endgame because of his native three dice attack.
Variations
You could just take eight Vultures and get a similar effect but with two more ships. The downside to that is, A) you need a lot of Vultures (which is the main impetuous, I don’t own eight but do own three), B) You lose the consistency of the Barrage Rocket Hyenas and C) All that die before they shoot are just dead. With TA-175, they are at least increase the attack/survivability of every other ship after they die. Plus this list has the exact same amount of health as eight Vultures but includes some shields.

Wayne Basta
Latest posts by Wayne Basta (see all)
- X-Wing Tier List – Rebels - May 10, 2023

