
Welcome to Rogue Squadron, pilot! In this series, we will be looking at different squadrons you can fly in Fantasy Flight Games X-Wing miniatures game. We give you the squad, what expansion pack all of the upgrades come from and then give you the lowdown on how best to fly it. Strap in and get ready to fly.
All Wings Report In
 HWK-290 “Palob Godalhi” (Scum Conversion Kit) (62ts) (I3)
At the start of the Engagement Phase, you may choose 1 enemy ship in your firing arc at range 0-2. If you do, transfer 1 focus or evade token from that ship to yourself.
- Crew- Q’ira (Lando’s Millenium Falcon Pack): While you move and perform attacks, you ignore obstacles that you are locking.
- Modification- Engine Upgrade (Scum Conversion Kit): Adds White Boost.
- Title- Moldy Crow (Rebel Conversion Kit):Gain a Forward Arc primary weapon with a value of “3.” During the End Phase, do not remove up to 2 focus tokens.
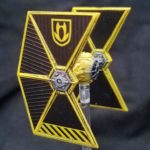 Mining Guild TIE Fighter “Captain Seevor” (Mining Guild TIE Expansion) (30ts) (I3)
While you defend or perform an attack, before attack dice are rolled, if you are not in the enemy ship’s Bullseye, you may spend 1 Charge. If you do, the enemy ship gains 1 jam token.
- None
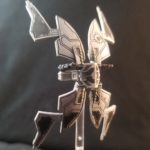 2x Starviper Attack Platform “Black Sun Assassin” (Scum Conversion Kit) (54 pts) (I3)
Microthrusters: While you perform a barrel roll, you must use the 1 bank template instead of the 1 straight template.
- Sensor- Collision Detectors (Scum Conversion): Charges: 2. While you boost or barrel roll, you can move through and overlap obstacles. After you move through or overlap an obstacle, you may spend 1 Charge to ignore its effects until the end of the round.
Lock S-Foils in Attack Position
I threw this squad together for a bit of fun at a local tournament. I mainly wanted to fly StarVipers and was looking for what to add to it.
Palob is always annoying and also I3. Gives your opponent a prime target while your StarVipers flank them. And with Moldy Crow, you can’t just Lock and ignore Palob. With his supply of Focus tokens and a 180 degrees of firing coverage, he’ll still do some damage.
Rounding it out, Seevor was a perfect amount of points, and also I3. It’s always nice to keep everyone at the same initiative level if you an or aren’t trying to include a much higher initiative ace. Seevor’s also works well to draw attention away from the flanking StarVipers. He’s hard to kill with his ability to jam away a token. Or he’ll be a great boost for the rest of the squad if he shoots first to jam away a defensive token.
Once I had Seevor in place, I had 14 more points to spend. It’s already a squad that excels at token shenanigans. Might as well lean into Seevor’s other ability and just ignore obstacles. Collision Detectors for the StarVipers funky barrel rolls gives them even more wacky maneuverability. It’s important to remember they don’t have to spend a charge to barrel roll over rocks. That’s just part of the card. So if you’re still shielded and won’t land on the rock, it might be worth saving the charge. Q’ira was just kind of an afterthought. You won’t use her much, as you’re usually focusing or boosting with the HWK. But getting one big rock locked early can be helpful.
Variations
If you’re not interested in the rock shenanigans, you can always change the Collision Detectors to FCS and Q’ira to Perceptive Co-Pilot or Lando. Or a Shield Upgrade and one of the many four point crew. Or drop all upgrades aside from Moldy Crow and turn one StarViper into Guri.


Wayne Basta
Latest posts by Wayne Basta (see all)
- X-Wing Tier List – Rebels - May 10, 2023