
Welcome to Rogue Squadron, pilot! In this series, we will be looking at different squadrons you can fly in Fantasy Flight Games X-Wing miniatures game. We give you the squad, what expansion pack all of the upgrades come from and then give you the lowdown on how best to fly it. Strap in and get ready to fly.
All Wings Report In (Hyperspace)
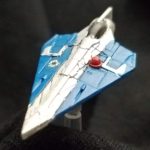 Delta-7 Aethersprite “Ahsoka Tano” (Delta-7 Aethersprite Expansion) (46ts) (I3)
After you fully execute a maneuver, you may choose a friendly ship at range 0-1 and spend 1 Force. That ship may perform an action, even if it is stressed.
Fine-tuned Controls: After you fully execute a maneuver, you may spend 1 Force to perform a Boost or Barrel Roll action.
- Configuration/Modification- Calibrated Laser Targeting (Wave 3): While you perform a primary attack, if the defender is in your Bullseye, add 1 Focus result.
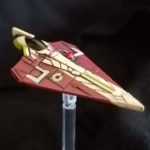 3x Delta-7 Aethersprite “Jedi Knight” (Delta-7 Aethersprite Expansion) (39ts) (I3)
None
Fine-tuned Controls: After you fully execute a maneuver, you may spend 1 Force to perform a Boost or Barrel Roll action.
- Configuration/Modification- Calibrated Laser Targeting (Wave 3): While you perform a primary attack, if the defender is in your Bullseye, add 1 Focus result.
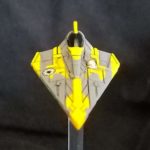 Delta-7 Aethersprite “Jedi Knight” (Delta-7 Aethersprite Expansion) (39ts) (I3)
None
Fine-tuned Controls: After you fully execute a maneuver, you may spend 1 Force to perform a Boost or Barrel Roll action.
- None
Lock S-Foils in Attack Position
There’s a lot of Jedi lists out there. But all too often the generic Jedi Knight is overlooked in favor of the named master Jedi. After all, why have one Force when you could have two or three? A Jedi Knight can’t used Fine Tuned Controls AND spend the Force to modify the free Focus from CLT. Plus, it’s harder to get Bullseye with an I3 than an I4-6. These are all true statements. But you’re not flying this list the same way you could an Obi-wan/Anakin/Plo Koon list. These aren’t aces. These are A-wings with weak Prockets.
At I3, you’re an ace against those I1 and I2 swarms. Against other I3’s and above, you’re a swarm of bees, buzzing around in unpredictable ways. If you get Bullseye, great, you can punish them, but you’re not trying to hard for it. More than anything, you’re dancing around dipping into and out of engagement.
Droid swarms will be the biggest weakness. They like to spread out and sit on rocks so it’s going to be hard to envelop them and then run away effectively.
Boba/Fenn you’ll actually have a reasonable chance against. With your five ships spread out, it’s going to be hard for Boba and Fenn to completely arc dodge you, as well for Boba to get multiple rerolls since your ships will be spread out. Fenn could still pop a Jedi per turn but then if you can get one bullseye on him a turn he won’t last long.
Variations
You could make Ahsoka a less tempting target by moving the CLT from her to the last Jedi Knight. Or you could dump all of the CLT’s to get Bariss Offee and another Jedi not named Obi-wan Kenobi.
I toyed with three Jedi Knights + Ahsoka with R2 Astromechs and CLT or four Knights with Foresights and R2. This would do hit and fade better because when you disengage you can recover your shield. But then you only have four ships.


Wayne Basta
Latest posts by Wayne Basta (see all)
- X-Wing Tier List – Rebels - May 10, 2023