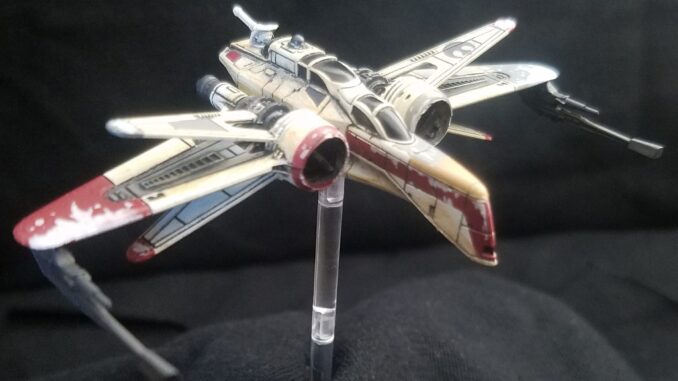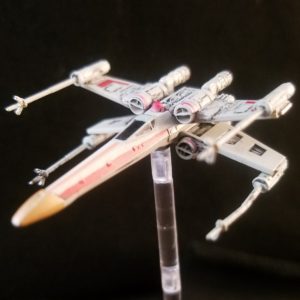
Welcome to Rogue Squadron, pilot! In this series we will be looking at different squadrons you can fly in Fantasy Flight Games X-Wing miniatures game. We give you the squad, what expansion pack all of the upgrades come from and then give you the low down on how best to fly it. Strap in and get ready to fly…
All Wings Report In
 ARC-170 “Norra Wexley” (ARC-170 Expansion) (40 pts) (PS 7)
When attacking or defending, you may spend a target lock you have on the enemy ship to add 1 Focus result to your roll.
- Title– Alliance Overhaul (ARC-170 Expansion): When attacking with a primary weapon from your primary firing arc, you may roll 1 additional attack die. When attacking from your auxiliary firing arc, you may change 1 of your Focus results to a Critical result.
- Elite Pilot Talent- Push the Limits (A-Wing/Imperial Aces Expansions): Once per round, after you perform an action, you may perform 1 free action shown in your action bar. Then receive 1 stress token.
- Modification- Vectored Thrusters (ARC-170 Expansion): Your action bar gains the Barrel Roll action icon.
- Crew- Kyle Katarn (Rebel Aces Expansion): After you remove a stress token from your ship, you may assign a focus token to your ship.
ARC-170 “Shara Bey” (ARC-170 Expansion) (34 pts) (PS 6)
When another friendly ship at Range 1-2 is attacking, it may treat your blue target lock tokens as its own.
- Title– Alliance Overhaul (ARC-170 Expansion): When attacking with a primary weapon from your primary firing arc, you may roll 1 additional attack die. When attacking from your auxiliary firing arc, you may change 1 of your Focus results to a Critical result.
- Elite Pilot Talent- Draw Their Fire (Millenium Falcon Expansion): When a friendly ship at Range 1 is hit by an attack, you may suffer 1 of the uncanceled Critical results instead of the target ship.
- Crew- Nien Nunb (Millenium Falcon Expansion): You may treat all straight maneuvers as green maneuvers.
 T-65 X-wing “Biggs Darklighter” (Original Core) (26 pts) (PS 5)
Other friendly ships at Range 1 cannot be targeted by attacks if the attacker could target you instead.
- Astromech- R4-D6 (Rebel Transport Expansion): When you are hit by an attack and there are at least 3 uncanceled Hit results, you may choose to cancel those results until there are 2 remaining. For each result canceled this way, receive 1 stress token.
- Modification- Integrated Astromech (T-70/Heroes of the Resistance Expansion)- When you are dealt a Damage card, you may discard 1 of your Astromech Upgrade cards to discard that Damage card.
Lock S-Foils in Attack Position
This list focuses on using Biggs to keep the ARCs alive and using the ARCs to help keep Biggs alive. With their one defense die ARCs fall into the heavy but squishy category along with B-wings, Y-wings, and K-wings. Even with nine health they can get dropped with 2-3 torpedo hits which is not hard to do on turn one. Since these ships, especially Norra, are your heavy hitters in this list that would be very bad.
With Biggs there your opponent has to shoot him first. That’s his job and why you still see X-wings on the table. With the combination of R4-D6, Integrated Astromech and Draw Their Fire on Shara, Biggs is almost guaranteed to stay alive through three shots. You hit him with three, four or five hits; he reduces it to two. You hit him with two hits and a crit, Shara takes the crit and Biggs still takes two damage. It’s not until you hit him with four dice and at least two are crits that he will take three damage. That’s possible but unlikely.
Thanks to R2-D2, Shara does not mind taking a few crits to keep Biggs around a little longer. She can recover that shield next round and when Biggs finally buys it she’s healthy or at most one shield down. Meanwhile, she and Norra have been pounding on your opponent in return, shooting whomever they want.
Norra and Shara work very well together. You target lock with Shara and Norra target locks and pushes to focus. That gives you high odds of getting 4-5 hits (depending on range) with Norra. If she didn’t need to spend Shara’s target lock then Shara or Biggs gets to use it for their attack.
After Biggs dies you have two potential tactics depending on whom your enemy picks as their next target. If they go after Norra, Shara stays nearby and continues to use Draw Their Fire to help keep Shara alive longer. If they go after Shara, she should bug out and use her four straight green maneuver to recover her shields. She can still fire at any ships that chase her thanks to the rear arc. Meanwhile, Norra remains unmolested and can dish out the pain.
Variations
There isn’t a lot you could change about this list without really switching things up. Vectored Thrusters on Norra is the only upgrade that doesn’t really play a direct roll. It’s very helpful for her to have some repositioning ability (in the tournament where I ran this list there were several instances that the barrel roll gave me a shot I wouldn’t have otherwise had). But you could switch it out to give someone a seismic torpedo for funsies. Even if you never fire it that gives you some board control as you just deny areas near obstacles to your opponent.
You could also switch out Kyle Katarn for Kanan Jarrus. That opens up several more maneuvers for Norra to clear her stress. Being able to take hard 2’s and clear stress is very appealing. It does mean you can’t end up with double focus tokens, which limits how effective R5-P9 will be.
Wayne Basta
Latest posts by Wayne Basta (see all)
- X-Wing Tier List – Rebels - May 10, 2023
