
Welcome to Rogue Squadron, pilot! In this series, we will be looking at the ships you can fly in Atomic Mass Games X-Wing miniatures game. We’ll take a look at a chassis and what makes it unique along with some upgrades and squadron combos. Strap in and get ready to fly.
Lock S-Foils in Attack Position
 Welcome to X-Wing 2.5! We’re going to start wading through each of the different ship types in X-Wing, taking a close look at each pilot and their potential builds. Thanks to the inclusion of Loadout Points, we can now actually present a couple of builds to you for each pilot, any of which can be used whenever you take the pilot. This will make swapping builds around simple.
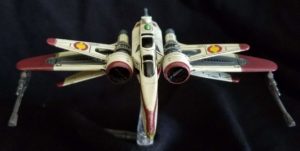
Originally, I wanted to start with the core of the game, the T-65 X-Wing. However, with twelve different pilots that was a bit daunting to tackle right out of the gate and get done in a reasonable amount of time. So I shifted gears towards the start of the alphabet and settled on the Rebel ARC-170. With only four pilots, we can ease into this new paradigm of loadout construction with a more manageable number. Also, as points would have it, you can take all four pilots together in one squad because why not?
The ARC-170 itself is a tough medium ship. With nine health (3 shields, 6 hull) it can take a couple shots to chew through despite only having one green die. It has a three die front attack, making it a good threat, and a two die rear shot helping you avoid getting arc dodged. All of the pilots have access to astromech, double crew, gunner, modification, and talent slots. They all then have some kind of secondary weapon, usually a torpedo but there are a few missiles and even one cannon.
Thanks to loadout points, their gunner slot will very often be filled with a Veteran Tail Gunner. Long not worth the points given how rare getting to shoot out the front and back were, this upgrade becomes far more valuable now. Given objectives, the chances of having enemies in front and behind goes up. But most importantly, taking it does not diminish the rest of your squad. At only two points, each one just affects the individual pilot’s loadout. They won’t always want it, but it’s a strong candidate.
As a medium size ship, the ARC-170 counts as two when checking objectives for control. This gives them an extra power boost for control based objectives. They can die easily, but if they can score enough points first, it might not matter.
Red Five Standing By
 Ironically, despite the Rebel ARC-170 being legal in Standard format, the Rebel ship does not come out of any 2.0 black box. The four unique pilots have no generics and come straight from the Rebel Conversion Kit. You can acquire ARC-170’s from the Republic or old school 1.0 boxes.
Instead of full squads, we’re going to look at different loadouts for each pilot. So, how many ARC-170’s do you need? Often, one makes a good addition to a squad. With squads points ranging from 4-6 you can find a pilot to fit into most any squad. But their spread of 4,5,5,6 points means you can fit all the pilots together in one squad and get a decent one. It’s worth considering getting four, especially since you’ll get double value being able to use the models in Republic Squads as well.
Norra Wexley (6 pts) (I5)
Pilot Ability – While you defend, if there is an enemy ship at range 0-1, add 1 Evade result to your dice results.
- Her ability went up in value with 2.5.
- Before, you’d try to end up in range to trigger it but end up bumping with your giant medium base, preventing you from shooting. But now she can still be attacked and still make an attack at range 0.
Loadout Points – 16
- Astromech, Crew, Crew, Gunner, Modification, Talent, Torpedo.
- With the highest amount of Loadout Points of the ARC-170’s, Norra has the most flexibility in what she carries.
- This allows her to take more powerful potential combos than the others.
Loadout #1 – “We’re Doomed” (16/16)
- Role: Flexible/Squad Support
- Crew- C-3P0 (5)
- Crew- Leia Organa (7)
- Gunner- Veteran Tail Gunner (2)
- Talent- Enduring or Expert Handling (2)
This loadout aims to give Norra maximum flexibility. Two calculate tokens are better than one focus token. With them she can modify multiple attack dice, an attack and defense die, have mods for multiple defense rolls, or risk using Threepio’s ability to potentially get three evades. Leia lets her serve as squad support or just give herself white K-turns every few rounds.
Loadout #2 – “Token Stacking” (16/16)
- Role: Objective Control
- Crew- Jyn Erso (5)
- Crew- Perceptive Copilot (8)
- Gunner- Veteran Tail Gunner (2)
- Talent- Marksmanship (1)
This makes her ideal for contesting objectives. Norra doesn’t mind bumping into her target. If she does, she’ll still get to take the focus action, triggering Perceptive Copilot and Jyn to end up focus/evaded, guarantying she avoids the first two hits she takes. With a medium base she is perfect for parking near a contested objective and not dying while maintaining control of it. VTG helps her out when she gets flanked from doing this. Marksmanship gives her a chance to pop crates picked up by opposing ships.
Loadout #3 – “Hand me the Hydrospanner!” (16/16)
- Astromech- R5 Astromech (4)
- Crew- Chewbacca (3)
- Crew- R2-D2 (8)
- Talent- Hopeful (1)
This Norra is always going to be shielded. She loses her shields, Artoo gives her one back. If she ends up needing to flip a damage card over, Chewie just flips it back. If it’s one you don’t want to risk flipping back over again, you have the R5 Astromech to fully repair and discard it. Hopeful rounds it out as a one point upgrade. It’s interchangeable with Deadeye and Marksmanship but has some value on Norra. If it triggers, she can make good use of the Boost to close to range one to trigger her ability for future attacks against her.
Shara Bey (5pts) (I4)
Pilot Ability – While you defend or perform a primary attack, you may spend 1 lock you have on the enemy ship to add 1 Focus result to your dice results.
- If you do not have a way to generate locks and convert focus results, her ability is hard to make use of.
- The fact her ability works on defense is often overlooked.
- Her ability does not work when firing secondary weapons, but you can get the lock in order to fire off a missile and then use the lock for defense.
Loadout Points – 12
- Astromech, Crew, Crew, Gunner, Missile, Modification, Talent, Torpedo.
- She wants upgrades that give her focus mods or free locks.
- Ursa Wren, R3 Astromech, Magva Yarro, Saw Gerrera, Grogu (The Child), Kanan Jarrus, Ezra Bridger all provide one of those.
- The missile and torpedo slots will be the least likely to be filled.
Loadout #1 – “The Momdalorian” (12/12)
- Crew- Ursa Wren (6)
- Crew- The Child (6)
To use her ability, she needs Lock and Focus. Ursa Wren does two things here. She provides the ability to maintain two locks, expanding your options for which ship you can use the bonus result against. She also gives Shara a free lock anytime a friendly ship gets locked. With a 0-3 bubble off a medium base, that’s a good chunk of the board. The lock does not have to be on the enemy ship that locked the friendly ship. Further expanding on this, The Child’s condition card allows an enemy ship to gain a lock on Ursa after attacking her. That’s a big downside for the Child. But Ursa mitigates this by giving Shara a lock back in return. She can use the Child’s Force and her Lock to gain defense results to stay alive longer. Then, if she still takes damage, she’ll recover some Force and potentially reacquire her Lock. At the very least, it makes your opponent reconsider getting that free Lock on Shara.
Loadout #2 – “Nothing to Lose” (12/12)
- Astromech- R3 Astromech (3)
- Crew- Saw Gerrera (9)
This is not a defensive combo, and in fact will ensure Shara does not last long in a fight. But while she is there, she’s going to be swinging for the fences. With R3, Shara can lock two different targets, helping to ensure she has a lock on a target that ends up in her arc. With that lock, she adds a focus result and uses Saw to turn it, and any others she rolled, into Crits. She’ll take damage but if she has a lot of health and might eliminate targets faster than they can eliminate her.
Loadout #3 – “Best of Both Worlds” (12/12)
- Astromech- R3 Astromech (3)
- Crew- C-3P0 (5)
- Gunner- Veteran Tail Gunner (2)
- Talent- Enduring (2)
This version of Shara is not going to be triggering her ability every round, unlike the others. But she has some more flexibility. With R3, she gets the two locks to set up the next turn. Next round, she uses Threepio to get two calculate tokens. With those two tokens, so she can convert both locks if she has cause to use them both. Either shooting at both of her two targets thanks to VTG. Or defending against both of her targets. Or some combination there of.
Loadout #4 – “Spectre 1” (12/12)
- Crew- Kanan Jarus (12)
The easiest way to trigger her ability consistently is to have some Force. Kanan gives her that, allowing her to just take the Lock action every round. In a pinch, his ability is also handy.
Garven Dreis (5pts) (I4)
Pilot Ability – After you spend a focus token, you may choose 1 friendly ship at range 1-3. That ship gains 1 focus token.
- He makes a nice wingman for Shara with the ability to pass her a focus.
- He wants to make use of Veteran Tail Gunner (VTG) more than the others. The more opportunities he has to fire, the more chances he has to pass his Focus. If he doesn’t roll eyeballs, he can’t spend it, and can’t pass it.
Loadout Points – 11
- Astromech, Cannon, Crew, Crew, Gunner, Missile, Modification, Talent.
- The only ARC with a cannon slot. None of them stand out as particularly valuable for him in particular, but ions are always worth considering.
- Note, that if he uses a cannon, he can’t trigger VTG.
- Acquiring multiple focus tokens gives him more tokens to potentially pass around.
Loadout #1 – “Plain, Simple, Garven” (11/11)
- Astromech- R3 Astromech (3)
- Crew- Perceptive Copilot (8)
This is a no frills build. You have Perceptive for double focus, which is what you’ll be doing most of the time. Two Focus tokens you can pass around to friends. R3 Astromech gives you extra bang for your buck on those turns you can afford to take a Lock action.
Loadout #2 – “Point Blank Range” (11/11)
- Crew- Baze Malbus (3)
- Crew- Jyn Erso (5)
- Gunner- Veteran Tail Gunner (2)
- Talent- Hopeful (1)
This Garven looks to provide extra support to his squad in the form of Jyn Erso who can turn any of the Focus he passes, or that allies gain normally, into evades as needed. When he gets right up into the enemy’s face, Baze gives him the chance to gain multiple tokens to use. On those turns he manages to get right into the middle of a squad to trigger Baze, he ca potentially also shoot twice with VTG.
Loadout #3 – “Garven’s Got Your Back” (11/11)
- Crew- Chopper (1)
- Cannon- Tractor Beam (4)
- Missile- XX-23 Thread Tracer (4)
- Talent- Selfless (2)
Here Garven is all about the team. He has a Tractor Beam to move a target into arc of an ally while reducing its agility. Alternatively, he can fire a Thread Tracer to give the rest of the squad locks. In addition to sharing his focus token, if you’re about to suffer a crit, he’ll take that bullet for you because that’s the kind of stand-up guy he is. He works best in a squad of I4 or below in order to get maximum utility out of his Tractor Beam and missile. Chopper rounds out the list to help ensure he always had a focus token ready to share.
Ibitisam (4pts) (I3)
Pilot Ability – After you fully execute a maneuver, if you are stressed, you may roll 1 attack die. On a Hit or Crit result, remove 1 stress token.
- With the 50/50 chance to clear stress after any maneuver, she has the most open dial of of the ARC’s.
- This makes her a good candidate to race after objective tokens at speed 4, something ARC’s generally try to avoid.
Loadout #1 – “Mom! Mom! Look at me!” (8/8)
- Astromech- Chopper (2)
- Crew- Hera Syndulla (4)
- Talent- Elusive (2)
The old standby combo of Chopper and Elusive, previously used by Ace of the Skies, Jek Porkins, gives Ibitisam a chance to recover a shield anytime she wants. Her ability allows her to take a red maneuver, recover Elusive, and then potentially end up unstressed to take a Chopper action to regain a shield. With Space Mom Hera onboard, she can take those high risk red maneuvers to recover Elusive, even when she starts stressed and definitely won’t get to use Chopper. Whenever she ends up double stressed, she can always take a blue and potentially clear both.
Loadout #2 – “Cassian Said I Had To” (8/8)
- Crew- K-2S0 (6)
- Gunner- Veteran Tail Gunner (2)
Another option for our Mon Cal who doesn’t care about stress, she can K-2S0 herself in order to end up with double mods. After blue maneuvers, she clears the stress and gets her regular action. After white maneuvers, she has a 50/50 chance to clear the stress and get a regular action. If she fails, she still has the calculate token.


Wayne Basta
Latest posts by Wayne Basta (see all)
- X-Wing Tier List – Rebels - May 10, 2023