
Welcome to Rogue Squadron, pilot! In this series, we will be looking at different squadrons you can fly in Fantasy Flight Games X-Wing miniatures game. We give you the squad, what expansion pack all of the upgrades come from and then give you the lowdown on how best to fly it. Strap in and get ready to fly.
All Wings Report In (Extended)
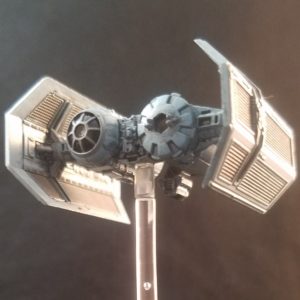 TIE/sa Bomber “Major Rhymer” (46 pts) (I4)
While you perform a Torpedo or Missile attack, you may increase or decrease the range requirement by 1, to a limit of 0-3.
Nimble Bomber: If you would drop a device using a template, you may use a bank template of the same speed instead.
- Missile- Cluster Missile
- Charges: 4
- Attack (Lock, 3, range 1-2)
- Spend 1 Charge. After this attack, you may perform this attack as a bonus attack against a different target at range 0-1 of the defender, ignoring the Lock requirement.
- Torpedo- Advanced Proton Torpedo
- Charges: 1
- Attack (Lock, 5, range 1)
- Spend 1 Charge. Change 1 Hit result to a Crit result.
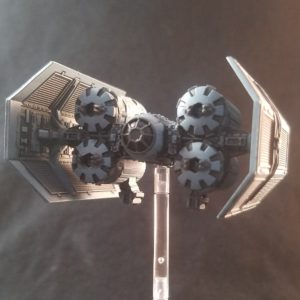 TIE/ca Punisher “Deathrain” (64pts) (I4)
After you drop or launch a device, you may perform an action.
- Missile- Barrage Rockets
- Charges: 5
- Attack (Focus, 3, range 2-3): Spend 1 Charge. If the defender is in your Bullseye, you may spend 1 or more Charges to reroll that many attack dice.
- Modification- Delayed Fuse
- After you drop, launch or place a bomb or mine, you may place 1 fuse marker on that device.
- Payload- Seismic Charge
- Charges: 2
- During the System Phase, you may spend 1 Charge to drop a Seismic Charge with the 1 straight template.
- Bomb Token – At the end of the Activation Phase this device detonates. When this device detonates, choose 1 obstacle at range 0–1. Each ship and remote at range 0–1 of the obstacle suffers 1 Hit damage. Then remove that obstacle.
- Payload- Thermal Detonator:
- Charges: 3
- During the System Phase, you may spend up to 2 Charges to drop that many Thermal Detonators using the 1 or 2 straight template. Each must be placed using a different template. When you reload this card, recover 1 additional Charge.
- Bomb Token – At the end of the Activation Phase, this device detonates. When this device detonates, each ship and remote at range 0–1 rolls 1 attack die. Each ship gains 1 strain token for each Focus result, and each ship and remote suffers 1 Hit/Crit damage for each matching result.
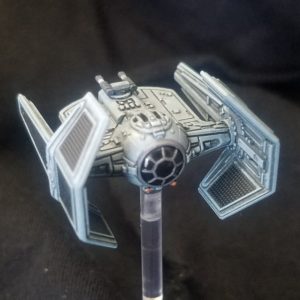
 TIE/rb Heavy “Rampage” (47pts) (I4)
After you execute a speed 3-4 maneuver, you may choose a ship in your Mobile Arc at range 0-1. If you do, that ship gains 1 strain token, or 2 strain tokens if you are damaged.
Rotating Cannons: You can rotate your Mobile Arc indicator only to your Forward or Aft. You must treat the Forward Arc requirement of your equipped Cannons upgrades as Mobile Arc.
- Cannon- Synced Laser Cannons
- Attack (3, range 2-3)
- If you are calculating, the defender does not apply the range bonus.
- Configuration- Maneuver Assist MGK-300
- Adds: Calculate, Barrel Roll -> Red Calculate
- Reduce the difficulty of your 3 straight and bank maneuvers.
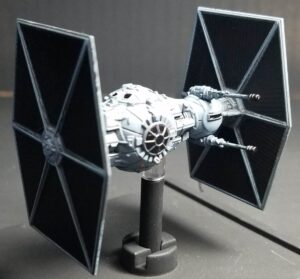
 TIE/ag Aggressor “Lieutenant Kestal” (43 pts) (I4)
While you perform an attack, after the defender rolls defense dice, you may spend 1 focus token to cancel all of the defender’s blank/Focus results.
- Missile- Barrage Rockets
- Charges: 5
- Attack (Focus, 3, range 2-3)
- Spend 1 Charge. If the defender is in your Bullseye, you may spend 1 or more Charges to reroll that many attack dice.
- Turret- Ion Cannon Turret
- Adds Rotate
- Attack (3, range 1-2)
- If this attack hits, spend 1 Hit or Crit result to cause the defender to suffer 1 Hit damage. All remaining Hit/Crit results inflict ion tokens instead of damage.
Lock S-Foils in Attack Position
You called for a specialist? These TIE’s bring unique payloads and abilities together to bring pain to the enemies of the Empire.
Deathrain brings up the rear, lobbing bombs and rockets into the fray. He will be flush with actions after throwing a bomb or two. He can use that to Focus for his Barrage Rockets or immediately reload to keep his supplies up. He has fuses to set up a cluster of bombs for his target to fly into on a future turn.
Kestal is offering a helping hand by swinging around the edge of the fight and ioning people into the bomb mess. He’ll always want to Focus so he can unload some rockets on an opportune target or use his ability to help get those ion tokens through.
Rampage gets in close to strain a vital target and then flies on past to use his Synced Lasers out the rear.
Rhymer is the group’s heavy hitter. He tosses out double cluster attacks from range and then finishes off a vital target with a massive burst Advanced Proton Torpedo.
The squads strength is variety. They have a lot of tools to bring to the table and can dish out high levels of damage. They also have relatively good health and are all I4. They don’t excel at maneuvering so are in trouble from aces. But even then, Rampage and Kestal have a variety of arcs to keep those aces on their toes.
Variations
If you want to increase your arc options, throw Multi-Missile Pods onto Deathrain and Major Rhymer. That makes them both have a 180 degree arc to fire from, increasing the overall board coverage the group has. Rhymer can even use them at range 3, negating one of the biggest negatives for the MMP.


Wayne Basta
Latest posts by Wayne Basta (see all)
- X-Wing Tier List – Rebels - May 10, 2023