
Welcome to Rogue Squadron, pilot! In this series we will be looking at different squadrons you can fly in Fantasy Flight Games X-Wing miniatures game. We give you the squad, what expansion pack all of the upgrades come from and then give you the low down on how best to fly it. Strap in and get ready to fly…
All Wings Report In
Round 1
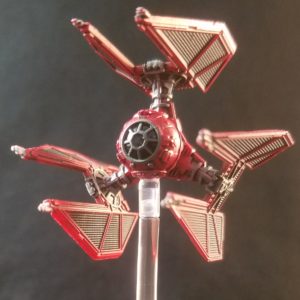 TIE Defender “Countess Ryad” (Imperial Veterans Expansion) (36 pts) (PS 5)
When you reveal a straight maneuver, you may treat it as a K-turn maneuver.
- Title- TIE/ x7 (Imperial Veterans Expansion): Your upgrade bar loses the Missile and Cannon upgrade icons. After executing a 3-, 4-, or 5-speed maneuver, you may assign 1 evade token to your ship. *(This was run before the recent FAQ change and the version used at the time)
- Elite Pilot Talent- Push the Limits (A-Wing/Imperial Aces Expansion): Once per round, after you perform an action, you may perform 1 free action shown in your action bar. Then receive 1 stress token.
- Modification- Twin Ion Engine mk II (TIE Punisher Expansion)-You may treat all bank maneuvers as green maneuvers.
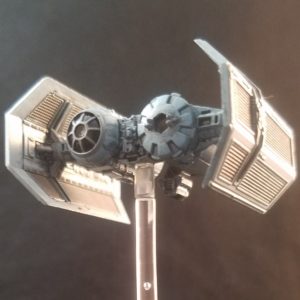
 TIE Striker “Countdown” (TIE Striker Expansion) (21 pts) (PS 5)
When defending, if you are not stressed, during the “Compare Results” step, you may suffer 1 damage to cancel all dice results. If you do, receive 1 stress token.
- Title- Adaptive Ailerons (TIE Striker Expansion): Immediately before you reveal your dial, if you are not stressed, you must execute a white 1 speed straight or bank maneuver.
- Modification- Twin Ion Engine mk II (TIE Punisher Expansion)-You may treat all bank maneuvers as green maneuvers.
Round 2
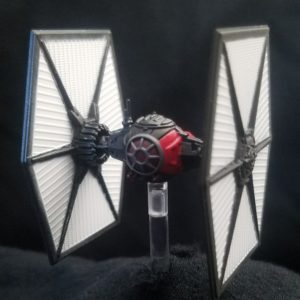 TIE/sf “Quickdraw” (TIE/sf Expansion) (33 pts) (PS 8 or 10)
Once per round, when you lose a shield token, you may perform a primary weapon attack.
- Title- Special Ops Training (TIE/sf Expansion): When attacking with a primary weapon from your primary firing arc, you may roll 1 additional attack die. If you do not, you may perform an additional attack from your auxiliary firing arc.
- Elite Pilot Talent- Adaptability (Mist Hunter Expansion): Side A: Increase your pilot skill value by 1. Side B: Decrease your pilot skill value by 1.
- Tech- Pattern Analyzer (Heroes of the Resistance Expansion)- When executing a maneuver, you may resolve the “Check Pilot Stress” step after the “Perform Action” step (instead of before that step).
- System- Fire Control System (B-Wing/TIE Phantom Expansions): After you perform an attack, you may acquire a target lock on the defender.
- Modification- Lightweight Frame (TIE Striker Expansion)-When defending, after rolling defense dice, if there are more attack dice than defense dice, roll 1 additional defense die. You cannot equip this card if your agility value is “3” or higher.
Round 3
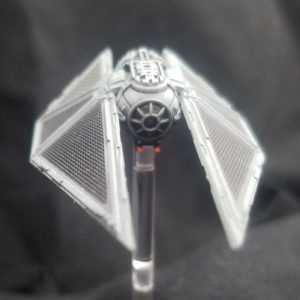
 TIE Bomber “Tomax Bren” (Imperial Veterans Expansion) (30 pts) (PS 8)
Once per round, after you discard an EPT upgrade card, flip that card faceup.
- Title- TIE Shuttle (Imperial Veterans Expansion): Your upgrade bar loses all Missile, Torpedo, and Bomb upgrade icons and gains 2 Crew upgrade icons. You cannot equip a Crew upgrade card that costs more than 4 squad points.
- Elite Pilot Talent- Lightning Reflexes (Kihraxz Expansion): After you execute a white or green maneuver on your dial, you may discard this card to rotate your ship 180°. Then receive 1 stress token after the “Check Pilot Stress” step.
- Crew- Tactician (TIE Phantom Expansion)- After you perform an attack against a ship inside your firing arc at Range 2, that ship receives 1 stress token.
- Crew- Rebel Captive (Lambda Shuttle Expansion)- Once per round, the first ship that declares you as the target of an attack immediately receives 1 stress token.
Round 4
 TIE/FO “Omega Leader” (TIE/FO Expansion) (29 pts) (PS 8)
Enemy ships that you have locked cannot modify any dice when attacking you or defending against your attacks.
- Elite Pilot Talent– Juke (TIE/FO Expansion)- When attacking, if you have an evade token, you may change 1 of the defender’s Evade results into a Focus result.
- Tech- Comm Relay (TIE/FO Expansion): You cannot have more than 1 evade token. During the End phase, do not remove an unused evade token from your ship.
TIE/sf “Quickdraw”
- Modification- Lightweight Frame (TIE Striker Expansion)-When defending, after rolling defense dice, if there are more attack dice than defense dice, roll 1 additional defense die. You cannot equip this card if your agility value is “3” or higher.
TIE Bomber “Tomax Bren”
- Modification- Lightweight Frame (TIE Striker Expansion)-When defending, after rolling defense dice, if there are more attack dice than defense dice, roll 1 additional defense die. You cannot equip this card if your agility value is “3” or higher.
Lock S-Foils in Attack Position
This list came together simply out of a desire to play a bunch of different things. I like each of these ships individually and with the escalation format you can get them all in together.
Round one went pretty well. Since it was the 60pt round I felt confident going in it would likely be a two on two match. I had seriously considered Omega Leader for this round but ultimately decided she was the ship I least wanted to play four times. But Countess Ryad is a pretty good powerhouse and no one wants to shoot at Countdown with just one ship.
Unfortunately, I ended up pairing up against a Ventress list with Latts Razi onboard. That pretty well nullified my Push the Limits and had the potential to shutdown Countdown’s ability. Fortunately, she was paired with Serissu who I was able to vaporize pretty quickly. Then I just kept Countdown at range 3 whenever possible and didn’t use Push unless Ryad was also at range 3. It still took awhile to whittle Ventress down but she couldn’t hurt me either so I won the attrition war.
Round 2 saw me face off against another Imperial list with Ryad. This one had four TIE fighters flying escort so five ships to three. Unfortunately, I lost this exchange pretty decisively. Quickdraw got eaten alive and my Ryad didn’t last much longer. In the end I had Countdown being chased by everything. But I did manage to kill his Ryad before dying so it wasn’t a total loss.
This emphasizes the list’s weakness to swarms. Ryad and Countdown are both very hard to kill with similar number of opponents. But when they are getting shot at multiple times they can get beaten down. Quickdraw is also similarly weak against multiple opponents because if he loses all his shields in one exchange his ability is pretty pointless.
Round three looked like it would go badly at first. Party bus Bossk with Zuckuss onboard, a tractor tug and some TLT Y-wing escorts. I had feared facing a bunch of Quadjumpers but but I wasn’t to worried about just one. He did manage to tractor Ryad in the first engagement and that allowed the rest of this list to melt her. I also had added Tomax which felt unfortunate because his main schtick, stress, was wasted as Bossk didn’t care about getting stress.
However, Lightning Reflexes proved amazing. Tomax was able to wheel around always staying behind Bossk and whittle him down. Meanwhile Adaptive Ailerons work great against TLT because it was quite easy to keep Countdown in the range one bubble. I also lost Quickdraw but not before killing Bossk with his return fire ability.
The final round saw a lot of shifts in fortune. So many it was kind of ridiculous. My opponent was wielding an Attanni Mindlink swarm of Manaroo, Fenn Rau, Old Teroch and two HLC carrying Scyk’s. On one hand, this is a fearsome list to fight as there is alot of action synergy. On the other, with my stress delivery I could cause a lot of trouble for him.
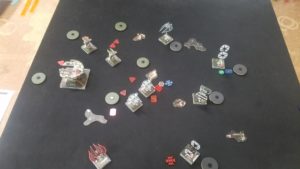 We set up in opposite corners for the most part and then started moving in. I feinted with Ryad and managed to pull off a perfect envelopment. All five of my ships were spread out around the board and I managed to have them converge from five directions at once. The first exchange saw Old Teroch get beaten down to one health and passing on a stress to everyone else thanks to Tactician and another for himself thanks to Rebel Captive. I managed to only lose a single shield on Quickdraw which is exactly what you want to happen.
Second engagement things started to unravel but not to bad. He moved Old Teroch in a way I did not expect and Tomax ended up parked on a rock. That kept me from being able to restress him. It also kept me from capitalizing on Old Teroch’s damage and finishing him. I did get to shoot with Omega Leader but only after Teroch stole her Evade token so I couldn’t use Juke. But I didn’t manage to vaporize a Scyk in a single shot from Quickdraw. Round three went similar with Old Teroch against giving up any attacks but landing Tomax on a rock. But I took almost took out another Scyk.
Around round four and five the wheels came off. Quickdraw got knocked down to one health, Tomax got wasted. And then a full health, fully tokened Ryad got killed in two shots. Blank green dice everywhere. It was disgusting. After that it was all downhill. I did manage to finish off Old Teroch and I had a legitimate shot at killing that one health Scyk before he could end Countdown but the dice were not with me.
Over all Escalation was a fun format. It was nice having each game feel like a completely different list rather than the usual tournament feeling of playing the same thing over and over.
Variations
The biggest change I would have made would be to put Lightweight Frame on Quickdraw and Bren earlier. Possibly by moving Omega Leader to an earlier round or just switching Pattern Analyzer for it on Quickdraw alone.
Wayne Basta
Latest posts by Wayne Basta (see all)
- X-Wing Tier List – Rebels - May 10, 2023