
Welcome to Rogue Squadron, pilot! In this series, we will be looking at different squadrons you can fly in Fantasy Flight Games X-Wing miniatures game. We give you the squad, what expansion pack all of the upgrades come from and then give you the lowdown on how best to fly it. Strap in and get ready to fly.
All Wings Report In (Extended)
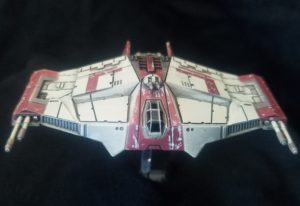
 HWK-290 “Tapusk” (42 pts) (I5)
During the End Phase, before an enemy ship in your Mobile Arc recovers 1 recurring Force or Charge, you may spend 2 Charges. If you do, that ship does not recover that Force or Charge.
- Modifiction – Engine Upgrade
- Requires Red Boost. Adds White Boost.
- Modification – Delayed Fuse
- After you drop, launch or place a bomb or mine, you may place 1 fuse marker on that device.
- Payload – Seismic Charge
- Charges: 2.
- During the System Phase, you may spend 1 Charge to drop a Seismic Charge with the 1 straight template.
- (Bomb Token) – At the end of the Activation Phase this device detonates. When this device detonates, choose 1 obstacle at range 0–1. Each ship and remote at range 0–1 of the obstacle suffers 1 damage. Then remove that obstacle.
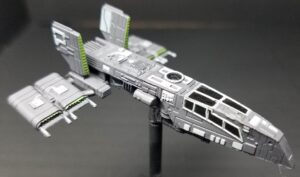
 Scurrg H-6 Bomber “Captain Nym” (52 pts) (I5)
Before a friendly bomb or mine would detonate, you may spend 1 Charge to prevent it from detonating.
While you defend against an attack obstructed by a bomb or mine, roll 1 additional defense die.
- Payload – Thermal Detonator
- Charges: 4
- During the System Phase, you may spend up to 2 Charges to drop that many Thermal Detonators using the [1 ] or [2 ] template. Each must be placed using a different template. When you reload this card, recover 1 additional Charge.
- (Bomb Token) – At the end of the Activation Phase, this device detonates. When this device detonates, each ship and remote at range 0–1 rolls 1 attack die. Each ship gains 1 strain token for each Focus result, and each ship and remote suffers 1 Hit/Crit damage for each matching result.
- Turret – Dorsal Turret
- Attack: 2
- Range: 1-2
- Adds: Rotate
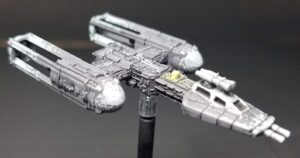 BTL-A4 Y-wing “Leema Kai” (54 pts) (I5)
Before you engage, if you are not in any enemy ship’s Forward Arc, you may acquire a lock on an enemy ship in your Full Forward Arc.
- Payload – Thermal Detonator
- Charges: 4
- During the System Phase, you may spend up to 2 Charges to drop that many Thermal Detonators using the [1 ] or [2 ] template. Each must be placed using a different template. When you reload this card, recover 1 additional Charge.
- (Bomb Token) – At the end of the Activation Phase, this device detonates. When this device detonates, each ship and remote at range 0–1 rolls 1 attack die. Each ship gains 1 strain token for each Focus result, and each ship and remote suffers 1 Hit/Crit damage for each matching result.
- Talent – Expert Handling
- Requires Red Barrel Roll
- Adds White Barrel Roll
- Torpedo – Plasma Torpedo
- Attack (Lock): 3
- Range: 2-3
- Charges: 2
- Spend 1 Charge. During the Neutralize Results step, Crit results are cancelled before Hit results. After this attack hits, the defender loses 1 shield.
- Turret – Dorsal Turret
- Attack: 2
- Range: 1-2
- Adds: Rotate
 BTL-A4 Y-wing “Kavil” (52 pts) (I5)
While you perform a non-Forward Arc attack, roll 1 additional attack die.
- Modification – Delayed Fuse
- After you drop, launch or place a bomb or mine, you may place 1 fuse marker on that device.
- Payload – Thermal Detonator
- Charges: 4
- During the System Phase, you may spend up to 2 Charges to drop that many Thermal Detonators using the [1 ] or [2 ] template. Each must be placed using a different template. When you reload this card, recover 1 additional Charge.
- (Bomb Token) – At the end of the Activation Phase, this device detonates. When this device detonates, each ship and remote at range 0–1 rolls 1 attack die. Each ship gains 1 strain token for each Focus result, and each ship and remote suffers 1 Hit/Crit damage for each matching result.
- Turret – Ion Cannon Turret
- Attack: 3
- Range: 1-2
- Adds: Rotate
- If this attack hits, spend 1 Crit or Hit result to cause the defender to suffer 1 Hit damage. All remaining Hit/Crit results inflict ion tokens instead of damage.
Lock S-Foils in Attack Position
 This takes a set of high health, I5’s with mobile arcs and loads them with bombs that will go off when you want them to. Drop a wave of Thermal’s using the speed 1-2 templates, delay them until the next round with Delayed Fuse or Nym and then do it again and see if your opponent can avoid them. Nym works two ways. He can hold one to defend himself with or just to keep it around for your opponent to fly into. With Kavil around and his bonus turret die, you’ll be able to ion targets more often.
Leema is one of our new Y-Wing pilots from Fugitives and Collaborators. With her ability, she can get good accuracy on her attacks if she can stay out of the front arc. At I5, she has a reasonable chance of succeeding at that. Expert Handling lets her barrel roll to avoid that arc without getting stressed. When she doesn’t need to do that, she can focus and then fire her torpedoes off double modded.
The HWK is another new pilot. Tapusk’s ability messes with charge or Force recovery, something we haven’t seen before in the game. Unlike previous HWK’s, his ability requires the mobile arc, not just an arc. So adding Moldy Crow isn’t as powerful for him. It would still be an extra three die attack arc but for this list it’s not worth the 16 points.
With all the ships having mobile arcs, you can fly this list loosely to maximize your bomb dropping range. Thermal’s aren’t the best bomb, as they only have a 50% chance of doing damage. But you do get to drop two at a time which increases your coverage potential. If you ever don’t have a target, each ship can reload their charges so drop them liberally.
Variations
There are a couple variations you can do with this. If you don’t care about the plasma torpedo, you can give everyone skilled bombardier, or upgrade the dorsals to ion cannons. If you’d rather have protons, you can lose the fuses and turn Kavil’s turret into a dorsal.
Switching out the Thermals would up the bomb threat potential. You can switch Thermals for Seismic’s, Ions, or Conner Nets as desired. To go for Proton Bombs or Concussion Bombs would require four more points which can be found from the plasma torpedo, the ion turret or delayed fuses.


Wayne Basta
Latest posts by Wayne Basta (see all)
- X-Wing Tier List – Rebels - May 10, 2023